Spring bulbs are one of the easiest ways to add color to your landscape. Our Garden Center Lead, Mitch Ellis, shares expert tips for planting tulips successfully.
The Allure of Spring and the Beauty of Tulips
This may be an unpopular opinion, but I will unabashedly declare that of all four seasons, I find spring to be my absolute favorite. Go ahead and call me crazy. I won’t disagree. Most folks would probably cast their vote for Autumn, as the cooling temperatures provide a welcomed relief from the oppressive heat of summer and simultaneously tease us with the gentle whisper of calm, cozy nights huddled around a fireplace; And while I will agree that the promise of pumpkin spice lattes and that old familiar, favorite comfy jacket making its inevitable return from within the deep, Narnia-bordering edge of the closet is alluring, there’s just something extra special about the quiet excitement of life bursting back into the scene as winter releases its icy grip over the landscape.
I’ll admit that here in the Midwest the weather can be horrendously unpredictable, especially in spring. Some days are cold enough to induce mild snow accumulation or even threaten a dreaded snap-frost, while other days – possibly within the very same week – can bring enough sunshine and warmth that they can only be properly appreciated beside a barbecue grill while casually clad in shorts and flip-flops. Oh, and don’t forget to bring your raincoat and galoshes for the unending maelstrom of rain that is sure to ruin the outdoor plans of even the most resolute gardeners and busybodies. Many have lost all hope of ever being able to accurately predict if the average spring day will be best suited for T-shirts, sweaters, or full-length parkas.
The erratic patterns often leave us to ponder why we voluntarily choose to live in such a turbulent environment, but the answer repeats itself each year in silent symphony, slowly growing in a steady crescendo that starts with just one blossom… and then another… and another. Crocus. Daffodil. Hyacinth. Tulip: the unwavering heralds of spring transform the drab stillness of vacant fields into a roaring orchestra of harmonious colors. It inspires poetry, painting, and even song. If you’ve ever wished to collect a piece of this natural tapestry for your own private escape but don’t know how to begin, this article can help you achieve botanical success. Let’s focus on that most delicate and iconic of spring flowers: the tulip.
Choosing the Right Location for Planting Tulip Bulbs
If you are an inexperienced gardener, transforming your landscape into a floral fantasy can quickly turn into a nightmare without proper guidance. Luckily, adding tulips and other spring bulbs to your personal sanctuary is a remarkably easy task. Just as with any other pre-meditated garden planning, your first step should be to consider location.
Understanding Tulip Origins and Sunlight Needs
A brief bit of tulip history: contrary to popular belief, [cue images of magnificent windmills surrounded by blankets of colorful blossoms bobbing joyfully across Dutch fields] tulips are not native to the Netherlands, [fanfare stops] but rather Central Asia and the Mediterranean. They were believed to be first cultivated in Türkiye, and their growing popularity in the 1500’s and international trade is how they were introduced to Europe. Those progenitor tulips looked quite a bit different from today’s modern edition after generations of selective breeding by growers have led to enhanced flower colors, shapes, and growth habits; however, a few familial traits persist in the descendants of today. For example, full sun is a must for best performance. If grown in a hotter, southern climate, then it may be best to keep them in an area where they receive afternoon shade to prevent premature blossom wither and sunburn, but aside from that the brightest, fullest exposure to sunlight is preferred.
Ensuring Proper Drainage for Tulip Success
Another key trait is that tulips require very sharp drainage to avoid bulb rotting. Their ancestors grew wildly within the slopes of rocky, mountainous areas where soil never becomes soggy for long periods, which gives modern tulips an edge in drought situations but also an intolerance for waterlogged conditions.
Growing Tulips in Containers: Flexibility and Creativity
Now, if you have surveyed your planting areas and have determined that you either do not have loamy, free-draining soil, or the available planting space does not receive at least six hours of full sun, or even if you are bound by the constriction of living in a concrete jungle, then I have some good news for you – tulips bulbs can be grown easily in containers! That’s right, containers. Portable, customizable, and unique. With a container, you can control the substrate in which the bulbs are grown to encourage proper drainage, mobility to redirect plants into the most sunlight-rich spaces and even create fascinating displays using containers of unusual sizes and shapes to complement the color and texture of the blooms.
One of my favorite displays is one that uses a small round patch in the ground, a 16 inch pot nestled beside it, and 24 inch pot placed behind to create a tight, stairstep effect with tulips in each to give vertical interest to the display as well as to satisfy the “Rule of 3” in landscape design that suggests planting in odd numbers because it keeps the eyes moving and the brain interested far more than if they were in even numbers. Don’t ask me why this phenomenon exits – I’m merely a horticulturist who likes talking about plants – but feel free to explore this theory yourself the next time you inspect someone else’s garden design.
When to Plant Tulip Bulbs for Optimal Growth
Now that we have covered the subject of suitable location, let’s discuss the matter of when to plant tulip bulbs. This question can easily be answered in a singular, monosyllabic, curt response: FALL. However, a single word answer would make for a very short and uninteresting blog entry, wouldn’t it? Let’s dissect and examine that answer a bit more thoroughly to extract the true essence of what “fall” really means on a solar scale.
Meteorological vs. Astronomical Fall: Finding Your Planting Window
Let’s begin by acknowledging the difference between Meteorological fall and Astronomical fall. Meteorological fall is an unofficial start that begins on September 1st. It’s a scientific system based on annual temperature cycles and is great for calculating seasonal statistics. Astronomical fall (Autumnal equinox) is the traditional start and is defined by Earth’s position in orbit and tilt. This system is regarded as unreliable for outdoor gardening as the start date varies by year, it ignores local weather, and the length of season is inconsistent.
Meteorological is generally the preferred system for gardeners, however, it should be noted that local climate is also a big factor in determining when to plant. For example: Imagine that it is now September 1st and the start of Meteorological fall. The average high temperature in Minnesota is in the 70’s, whereas in Florida it is likely in the 90’s. Now, let’s push ahead to October 1st. Minnesota is now averaging temperatures in the 50’s while Florida has only dipped into the 80’s. You can see there is a substantial difference, despite both being in the same calendar month.
Why is this science lesson relevant? Because timing your planting within the appropriate season is critical. Tulip bulbs require a chill period between 35 and 50 degrees for a minimum of 12-16 weeks to activate blooming, so gardeners in the northern range will have a shorter window to plant their bulbs before the ground freezes and becomes unworkable, whereas gardeners in the south have a longer period of opportunity to plant without consequence; however, they may need to chill their bulbs artificially for the requisite period of time to see positive results.
Regional Planting Times: Tailor to Your Climate
So, to summarize, tulips in Minnesota would need to be planted between late September to mid-October, while tulips planted in Florida would need to be chilled ahead of time, and then be planted somewhere between November and January. Here in the Saint Louis area, we should aim to plant sometime between October and December, with November being the most ideal timeframe as chilling temperatures impede the growth of fungus that can slowly rot bulbs, and to avoid the warpath of marauding squirrels and chipmunks as their season of hoarding has already met its peak. They find tulips to be quite tasty. We will discuss methods later to deter them and protect your vulnerable plants.
When and How to Fertilize Tulip Bulbs
Just as there is a proper time to plant your bulbs, there is also a proper time to feed them. Now, if you intend to fertilize your bulbs – which may only be necessary when trying to maintain the truly perennial varieties – there are a few elements to bear in mind.
Choosing the Right Fertilizer
To start, fertilization should occur at the time of planting and reapplied in the earliest part of spring. For tulips it is recommended to use a high-phosphorous fertilizer such as Bone Meal to encourage blooms, but some authorities believe that a healthy ecosystem is already chock-full of phosphorous and adding more will only inhibit the support from beneficial mycorrhizae fungi that connect plant roots and help them to absorb nutrients.
So, it may be better to utilize a slow-release fertilizer with a balanced ratio such as 10-10-10 to gently support all needs across the board. Simply sprinkle 1 or 2 tablespoons of granulated fertilizer into the soil in the same planting site with the bulbs or if feeding established bulbs, gently work the same recommended amount into the soil surface so it is not washed away with rain. With each subsequent spring shower this fertilizer will break down little-by-little and gingerly nourish the plants so they perform their best. Tulips are not heavy feeders and giving generous helpings of food can cause long, lanky growth and possibly no blossoms, nullifying your effort and expense. Take note that an overabundance of fertilizer can also be caustic to the bulbs and cause disfigurement, so try to avoid placing fertilizer pearls in direct contact with the skin of the bulbs themselves.
If you prefer to use a water-soluble fertilizer – which you may have on hand for your spring annuals – you can certainly apply it as well, just be careful not to go too wild with it as overconcentrated formulas can burn plants more easily and anything not absorbed immediately will likely be swept away with groundwater and end up in the nearest waterways encouraging devastating algae bloom. Most gardeners prefer the ease and consistency of the granulated slow-release.
How to Plant Tulip Bulbs Effectively
While planting a dormant bulb is not exactly rocket science, a bit of know-how and technique are beneficial to ensure your plants get the best start possible.
Step 1: Identifying the Top and Bottom of Tulip Bulbs
To begin, we should probably inspect the bulb itself to answer that age-old question of, “Which end is up?”. Tulip bulbs are generally very round by nature, but if you look closely, you will notice they are not perfectly spherical. They are closer to the shape of a teardrop than a ball. The elongated tip is where the new shoot will emerge and this is the side that should be pointed UP.
If you look at the reverse side – the root end – you will find it to be considerably flatter and may even possess the remnants of roots from the previous growth cycle. This end should be pointed DOWN. If you cannot easily identify the top from the bottom, do not fret – the plants are usually tenacious and will reorient their shoots upward, despite the misalignment. However, it would be far more advantageous to simply give them the proper placement from the start.
Preparing the Soil for Planting Tulip Bulbs
Now that we have established the proper position, let’s discuss how best to approach the digging process. If you are anything like me, then you appreciate the sensation of a good bit of soil between your fingers. It’s oddly soothing until you discover a hidden ground nest of angry insects with your uncovered and tender fingertips, or you kneel in the fresh droppings of a clearly well-fed raccoon. (This is why I always recommend wearing gloves and watching your step in the garden.) And it is these unexpected discoveries that lead us to try new techniques!
Yes, you can certainly dig individual holes by hand or by shovel, but tulips often look best planted in mass clumps and to hand-dig fifty to one hundred individual holes may seem like and easy chore on paper, but the first ten minutes of being on hands and knees while stabbing through rocky ground might compel you to reconsider.
Using Augers for Efficient Planting
I would like to suggest investing in an auger. If you are not familiar with the item, they are helical, drill-like devices that make planting jobs go from hardship to “handled” in no time.
Augers come in a variety of sizes and styles and there are many which are compatible with any common handheld drill, but there are also standalone versions that require gas or electricity and are ideal for big planting tasks that would normally take hours to complete. Select one that suits your needs best and within your budget, but buyer beware – the more affordable options are often crafted with inferior metal that will bend and chip with each subsequent use. Check the reviews on any product before committing to a purchase.
Quick Tricks for Mass Planting
Here’s a quick planting trick for when the job calls for a lot of bulbs at once: excavate the planting area first using augers to loosen soil and then shovels to remove bulk, then level remaining soil to the recommended depth and place bulbs as desired. Backfill with the previously removed soil and water well. Voila! Quick, easy, and ready for!
Preparing the Soil and Planting Depth
As far as depth and spacing are concerned, it is suggested for tulips bulbs to be planted somewhere between 6 to 8 inches below soil surface, or 3 times the bulb’s individual height. If bulbs are too close to the surface, they may not be able to support the long shoot they produce above ground and will be susceptible to being knocked over easily by wind or swept away with seasonal erosion. If placed too deeply, the shoot may struggle to emerge beneath the weight of extra soil, and the plant may fail entirely. In terms of spacing, 4 to 6 inches are ideal to give the plants breathing room and to maximize the appearance of a limited quantity. If a more robust appearance is desired, simply reduce space to 2 to 3 inches for a denser, fuller look.
Protecting Your Bulbs from Pests
One final recommendation for planting your bulbs is to consider the threat of pest presence as a constant obstacle. Squirrels and chipmunks are very attracted to the scent of vulnerable crocus and tulip bulbs, and the freshly disturbed soil will produce an irresistible compulsion for them to unearth your buried treasure. A simple trick to try and outwit them is to interplant daffodil and hyacinth bulbs (which are toxic and less attractive) in the same location as tulips to mask their scent. Daffodil and hyacinth require similar conditions to tulips, but need less depth during planting, so they can essentially form a light barrier of repellent odor above the tulips to keep burrowing creatures from stopping to inspect the area more deeply. And finally, the most effective strategy is to implement a physical barrier that pests cannot penetrate easily. Chicken wire is often a great choice because it allows plants to grow through uninterrupted, while holding an impenetrable shield above the tender bulbs below which most burrowing pests cannot overcome.
Maximizing Tulip Blooming Season
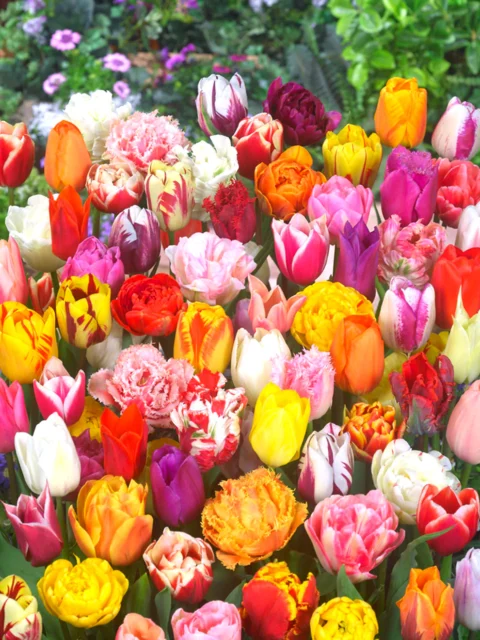
Just as there are several classifications of roses — all with their own unique properties and traits, the same is true for tulips. With dozens of classifications on today’s market, some careful planning and staging can turn a typical 2-week bloom period into a maximum of 6 weeks of explosive display. Some are hardier than others and only a few are truly perennial, but among the annual varieties are a few showstoppers that are so incredible you may just have to risk the heartbreak of knowing you will only have them for one season. Here’s a list of some varieties to watch for and what to expect from them:
- Darwin Hybrid – Perennial – Considered to be one of the best perennial tulips for its extra-large blossoms on strong stems which are excellent as long-lasting cut flowers and will rebloom for several years in the landscape when conditions are favorable. Blooms mid-spring.
- Triumph – Annual – Boasting the widest range of colors as well as many attractive bicolor flowers. Reliable performers in both flower beds as well as containers but may need freeze protection if kept in containers over winter. Blooms mid-spring.
- Double Flower – Annual – Double flowering tulips have a bold, remarkable appearance similar to peonies with their luscious, plump blooms and make quite an unforgettable impression in both the garden as well as bouquets. A little shorter than most other varieties and an excellent choice for forcing indoors. Both early and late blooming varieties exist.
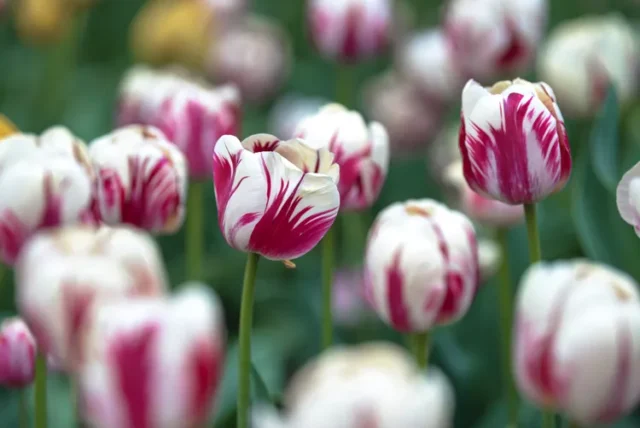
- Fringed – Annual – Easily recognized by their unique petal edges with finger-like tassels that catch sunlight and complement the bold color of each flower with an interesting, frayed appearance that will certainly ensnare attention. Blooms mid-season to late.
- Fosteriana (Emperor Tulips) – Perennial – The earliest blooming of the large-flowered varieties and an excellent companion to daffodils, especially when their warm spring colors harmonize to create a bright and sunny display. A great choice for naturalizing as well as forcing indoors. Blooms early spring.
- Greigii – Perennial – Reliably perennial, long-blooming tulips which often produce multiple cup-shaped flowers on a single stem which open to reveal separate interior colors, giving maximum color impact per bulb. Foliage on these beauties is often flecked with purple-burgundy spots or stripes and remains attractive even after the blossoms are gone. Great in beds or forced indoors. Blooms mid-spring.
- Kaufmanniana – Perennial – Compact growers with adorable blooms that are often splashed with intense stripes of red or pink, contrasting their primary color. Most varieties will open wide to resemble water lilies. Great in rock gardens or along borders. Suited for beds, window boxes, and patio planters if protected from intense cold. Notably long-lived perennial in the ground. Blooms very early spring.
- Lily-Flowered – Annual – Distinct and iconic, lily-flowered tulips have long, elegant stems and flared, recognizable, elongated blossoms. They are frequently used for bouquets but are also excellent in garden beds. Blooms late spring.
- Parrot – Annual – Fascinating fringed petals bear a ruffled, nearly exotic resemblance to actual bird feathers and continue to twist and scallop as the blossom matures. Boasting an impressive array of colors that range from pure white all the way to darkest purple-black for a complete spectrum of options. These tulips leave a lasting impression everywhere they can be seen and are a favorite among floral designers. Blooms late spring.
- Single Flower – Annual – Charming and delicate blossoms with a classic, uncomplicated appearance. These tulips are most frequently used to create the sweet, innocent spirit of a cheerful spring bouquet. An entire rainbow of color choices is available to suit any garden theme. Both early and late varieties exist, but early varieties tend to last longer as the blossoms are not usually exposed to the same heat extremes as later varieties. Blooms early or late spring.
- Viridiflora – Annual – Unusual blossoms all bear a characteristic green streak on their petals regardless of the primary color of the blooms, of which there are many options available. These flowers are long-lasting and are a splendid choice for unique, refined-looking bouquets. Blooms late spring.
- Species (Wildflower Tulips) – Perennial – Also known as Wildflower tulips. These bulbs closely resemble their uncultivated counterparts and are the closest to their original ancestors. If grown in an area with adequate drainage, they will return year after year and are hands-down the best choice for naturalizing. A terrific choice for an heirloom flower garden. Their short stature makes them ideal for rock gardens, the front of borders, forcing indoors, and containerizing if protected from deep cold. Blooms early spring.
The Importance of Rotating Planting Locations
In an ideal world we would never have to suffer the inconvenience of having to re-plant or relocate our prized flowers for their survival, but in the harshness of our reality, such is the case with many varieties of tulips. By their nature, tulips are very susceptible to rot caused by fungus. They first evolved in an area where excess soil moisture drained away quickly, encouraging them to develop water-saving features such as thick, fleshy bulbs and waxy leaves to prevent dehydration from evaporation.
This fortification, in turn, made them more vulnerable to common fungi which thrive in warm, wet conditions where the juicy bulbs have inadequate defense. Long, warm wet winters with very little chill period are usually a recipe for disaster in tulip beds, and to avoid loss in areas where those conditions occur it is advisable to remove bulbs once summer dormancy has fully taken effect and re-establish them in new areas where there is less chance for soil fungus to accumulate. Each planting site should receive 3 years of rest to keep fungus and disease from developing.
The good news is that this procedure may not be necessary for every type of tulip. Darwin Hybrids and Species-type tulips are known for their resilience and may never need to be adjusted to get a reliable bloom every spring, but even with the most favorable conditions there are still some dedicated tulip gardeners who will remove their bulbs from the ground every year to ensure they don’t fall victim to pest and disease pressure.
Managing Expectations for Tulip Gardening
Now that you as a budding tulip gardener have had a brief introduction into the most necessary details for flowering success, it is time to highlight that most critical of notions in any gardening endeavor: Managing your expectations of the result. That’s right – expect a few disappointments along the way. As we have already seen, there is a wide range of varieties on the market and while, yes – technically all tulips have the capacity to be perennial, most will only perform admirably during their first year and then steadily decline after that, and while you may receive subsequent blooms in following years, only the truly perennial varieties are likely to delight you with a dazzling encore performance.
Beyond that, there is also the constant threat from burrowing animals, fungus, and unexpected environmental conditions that keeps us biting our nails in anxiety. So, does this mean that tulips aren’t worth all the trouble and we simply shouldn’t bother with them at all? Not in the slightest. Tulips are magnificent specimens and represent the perseverance of fragile beauty against hostile forces and inhospitable conditions. They are a tangible celebration of rebirth after a season of cold, lifeless oblivion. Plant them. ENJOY them.
Do not deny yourself the opportunity to experience them just because there is a chance they may not perform as well as desired. Simply appreciate the results – whatever they may be – and look forward to the chance to try something different in the following year. You now have all the necessities at your disposal after taking the time to read this lengthy article to make your garden rich with spring color, so pick up that trusty trowel, get your hands dirty, and plant your hope for a beautiful future one little bulb at a time.
Article by: Mitch Ellis
Eckert’s Garden Center Lead